How to print PDF highlights with context on Apple devices
Turn PDF highlights into a compact review copy on iPhone, iPad, or Mac. Adjust context, print or save Focus View, and understand its export limits.
Direct answer
How can you print PDF highlights with surrounding context on iPhone, iPad, or Mac?
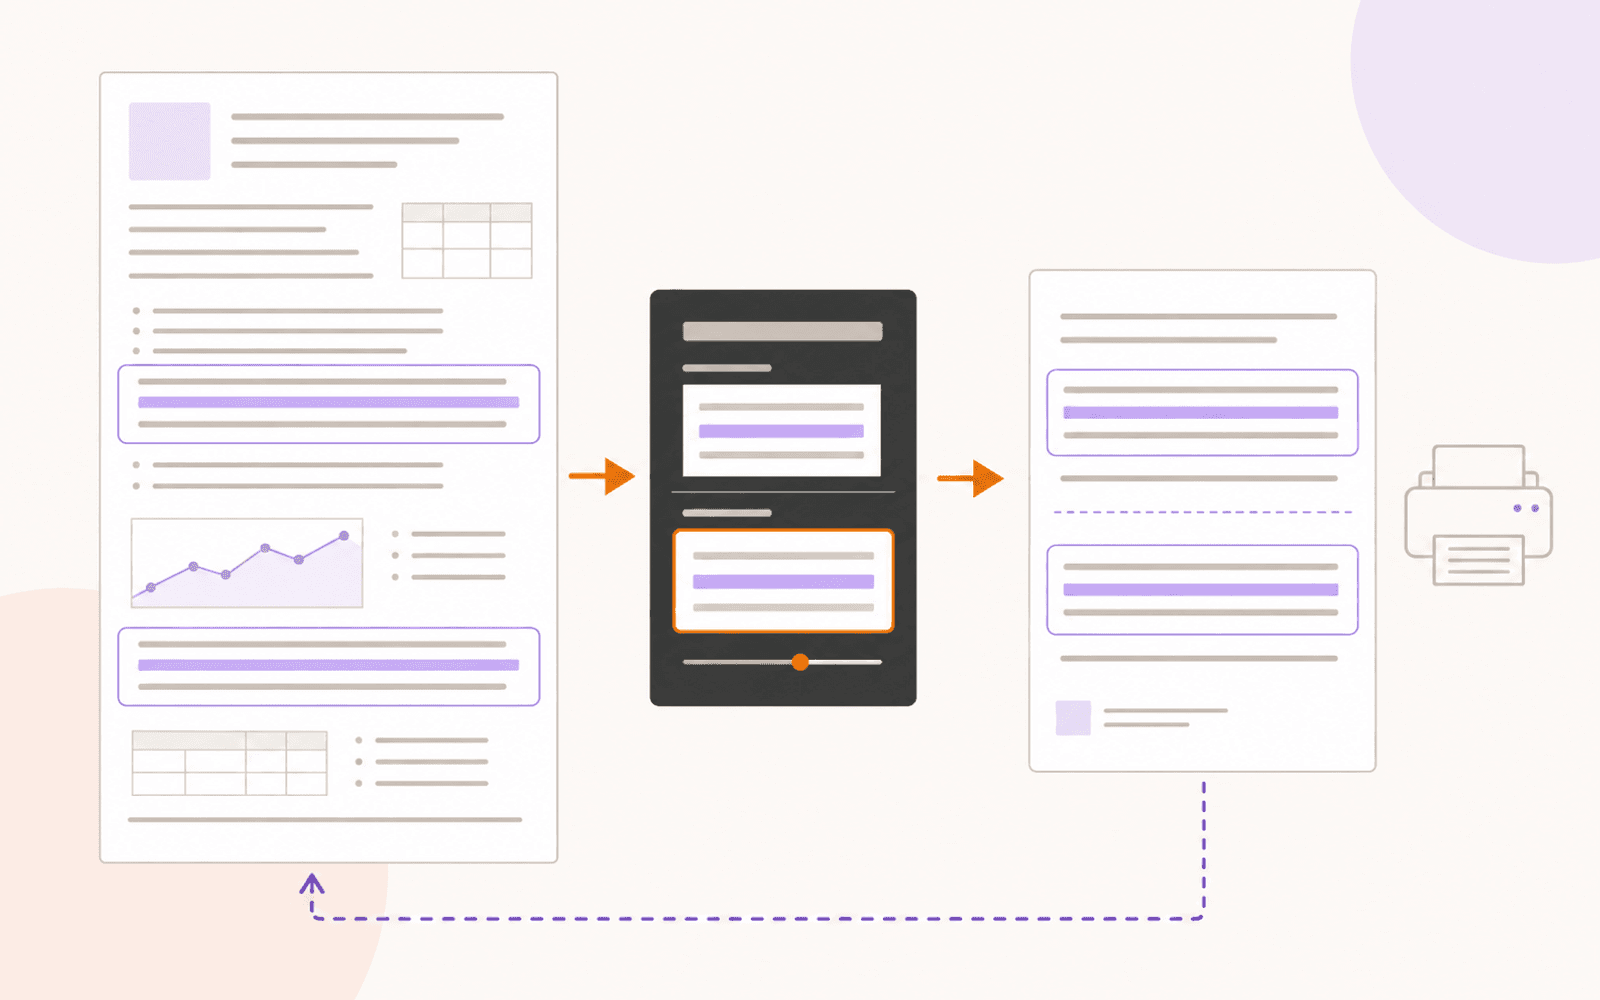
In PDF Max, open View > Focus to gather marked passages, then use Context to choose how much surrounding text remains visible. Under Output, choose Print Focus View or Save Focus View as PDF; iPhone and iPad also offer Share Focus View. Viewing is Free; these outputs require Premium. The result preserves page excerpts rather than extracting only highlighted words. It is a review copy, not redaction: hidden text from a contributing page can remain extractable.
To print just the useful parts of a highlighted PDF, first decide what you want on paper: a list of highlighted words, complete pages containing marks, or selected passages with enough surrounding text to understand them. Those are three different outputs.
For a lecture reading or journal article, the third is often useful. A highlighted conclusion may depend on the sentence before it; a result may need the condition or unit printed nearby. A compact review sheet should keep that context legible while shortening the route through the document.
PDF Max's Focus View folds the document around your marks. You control the surrounding context, inspect the resulting view, and then print or save it as a separate PDF with Premium. Start with a few marked passages so you can check the result before preparing a whole reading pack.
Choose the output you actually need
| What you want | Use this workflow | What to check |
|---|---|---|
| Highlighted words collected into notes | An annotation-summary or notes-export tool | Quote order, page references, and missing context |
| Original pages with their highlights | Print selected pages with annotations | Page selection and whether the marks appear |
| Visible passages plus nearby context | PDF Max Focus View output | Context, cropped figures, and source-page labels |
PDF Expert documents annotation-summary export, while Highlights distinguishes exporting notes from sharing the original PDF. These are useful starting points when the desired artifact is a collection of notes.
If whole pages are sufficient on Mac, Preview can print selected thumbnails and include visible notes. Open View > Thumbnails, Command-click the pages, choose File > Print, and select Selection in Preview. Inspect the print preview before proceeding.
Focus View serves the passage-with-context case. It retains visible horizontal bands of the page, so a two-column paper can include neighboring column content at the same height. It does not promise a file containing only the exact words you highlighted.
Prepare marks that Focus View can use
Open the PDF in PDF Max and highlight a few passages with the text-markup tool. Focus supports Highlight, Underline, Squiggly, and Strikeout marks. For this review workflow, keep Highlight enabled and narrow the other mark kinds if they are distracting.
The mark must remain a recognizable annotation. A colored line drawn with a pen, a photographed highlighter stroke, or color already flattened into the page is not the same thing as a PDF text highlight. If the file came from another app, check one mark before relying on the entire set. The guide to removing PDF highlights explains how to distinguish editable annotations from color baked into a page.
For an image-only scan, first check whether you can select the words. If not, make a searchable working copy with OCR, verify the recognized text, and add text highlights to that copy. Focus View does not itself add an OCR text layer.
Keep the original annotated PDF. It remains the complete source you will return to when a condensed passage needs more explanation.
Gather the passages in Focus View
- Open the View ribbon tab and choose Focus.
- Open Context in the Focus group.
- Under Marks, keep the text-markup kinds you want to review. For a highlights-only pass, narrow the filter to Highlight.
- Begin with Balanced context and read the resulting passages in document order.
- Increase context where a heading, qualification, caption, or surrounding explanation is missing.
The context amount applies across the view. The seams between retained passages show where material has been folded away; they are separators, not individual expansion buttons. Use the context controls or turn Focus off to inspect the complete document.
| Context choice | What remains visible | Useful when |
|---|---|---|
| Tight | Marked rows with minimal surrounding material | The passage makes sense on its own |
| Balanced | Marked rows with two rows of context on each side, where text-row information is available | A short explanation helps interpret the mark |
| Full page | The complete pages contributing matching marks | A table, figure, or multi-column layout needs the whole page |
| Custom | A global amount set with the bottom context slider | The presets leave too much or too little surrounding material |
Treat the preview as a reading check. Two extra rows do not guarantee that a complete sentence or caption survives. A table can span several bands; an equation may need a definition elsewhere on the page. Choose Full page or return to the original whenever the cropped view changes the meaning.
Print or save the review copy
With Focus View active, open View > Output in the Focus group and choose the command for the result you want:
- Print Focus View… prepares the visible passages for the system print sheet.
- Save Focus View as PDF… creates a separate PDF. On Mac, choose a filename and folder in the save dialog. On iPhone and iPad, choose a destination in the export picker.
- Share Focus View… is also available on iPhone and iPad and opens the sharing workflow for the generated PDF.
Use the specifically named Focus command. Print Whole Document… and the ordinary Print command print the full document, even while you are reviewing a folded view.
The output gathers the visible page bands onto sheets and includes source-page labels. Where the source has usable text, the output can retain selectable, searchable text rather than becoming a set of screenshots. A scan does not gain searchable words merely by being printed through Focus View.
Before printing a large pack, inspect the preview and print one representative sheet. Check small notation, highlight contrast, and any figure crossing a passage boundary. A shorter review copy is only useful if it remains readable at the final paper size.
Understand what the exported PDF still contains
This matters when you copy text from the exported file, search it in another reader, or hand it to a system that extracts PDF text. The visible page is not a reliable inventory of every word the file contains. Do not use Focus output as a way to disclose only approved lines from an otherwise confidential page.
For sensitive material, follow the separate guide to permanently redacting a PDF and verify the delivery copy. Focus's purpose is to make selected material easier to review.
The source-page labels also need interpretation. They identify positions in the source PDF; those positions may differ from printed textbook numbering because of covers or introductory pages. Check the original page before citing it. Do not assume the compact output's own page number is a citation to the source.
Troubleshoot a missing or unhelpful result
Focus finds no marks. Confirm that the source contains supported text-markup annotations and that the Marks filter includes them. Try one fresh text highlight. If that works but imported marks do not, inspect how the other app exported its annotations.
Too much of the page remains. Reduce context toward Tight and review the mark filters. Remember that the result uses horizontal page bands: it may include text beside a mark in another column. Use a notes-export workflow if you need only extracted words.
A passage loses its meaning. Increase context, use Full page, or inspect the original. Do not compensate by guessing what the missing qualification said.
Output commands are unavailable. Turn Focus View on and ensure it has matching marks. Printing, saving, and sharing the Focus derivative require Premium. PDF security permissions can also prevent output.
Plans, devices, and a useful first test
Creating text highlights and using Focus View on screen are included with PDF Max Free. Print Focus View, Save Focus View as PDF, and Share Focus View require Premium, including in the separate PDF Max Pro app. Ordinary whole-document printing remains Free, subject to the PDF's permissions. The plan comparison lists these as separate capabilities.
This workflow is available on iPhone with iOS 18 or later, iPad with iPadOS 18 or later, and Apple silicon Mac with macOS 15 or later. Focus viewing and PDF composition run locally and do not require Apple Intelligence or a downloaded language model. Retrieving a cloud-stored source, sharing a file, or reaching a network printer may still require a connection.
Open one annotated reading in PDF Max, choose three passages, and compare Tight with Balanced. With Premium, save one Focus PDF, reopen it, and verify each passage against its source-page label. That gives you a concrete review sheet to judge before processing the rest of the week's reading.